

Have you ever tried mastering product photography? Well, if you have, you must be aware that in an eCommerce business the first impression that you make on your potential customers is extremely crucial for the success of your business. In fact, we humans process images more quickly than text, and that is why we are almost immediately drawn to graphics. However, there’s certainly more to having a visually appealing website than a great color scheme or typography. Believe it or not, product images uploaded on your eCommerce website has the potential to make or break a sale. Through this post, let’s shed some light on some of the best practices for product images.
1. A Good Beginning Makes a Perfect End
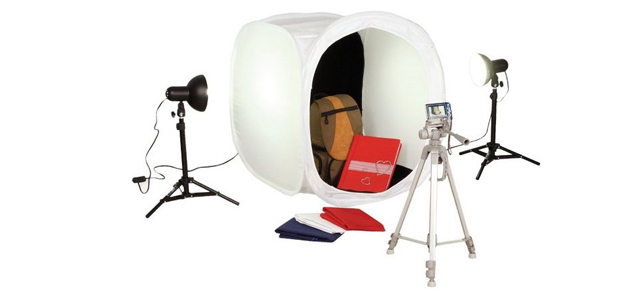
Firstly, keep your camera steady by placing it on a tripod. Next, ensure that you have sufficient lighting to take good quality product images. You can use numerous light sources such as flashes, desk lamps, strobes, etc. However, natural lighting is the best source to attain desired results.
Light from sun can be used as an indirect light source. Click product images near a window, and if you feel it’s getting too bright, you can diffuse the light using white sheets, blankets, etc. Proper lighting in the shooting stage will not only lead to better quality product images but also save a lot of your editing time and efforts.
Also, consider shooting against a white background. Yes, it is little bit of an extra effort but white background is easy to remove later when required. White color is a good reflector of light, so it is quite obvious that your products will turn out to be bright and nicely contrasted.
2. Help Customers Visualize
Who doesn’t love the convenience of online shopping? But, let’s face the truth, there is nothing like being able to touch a product before buying. When shopping online, potential customers are gripped by many dilemmas as they usually face difficulty visualizing what a product actually looks like. In order to provide your customers with the confidence to make a purchase it is imperative that you provide them with product images taken from different angles.
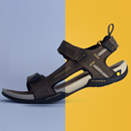
Begin with the “main image”. It’s the first product image that is visible to customers followed by a series of images. You can either choose a front-on shot or a forty five degree angle shot for your main image depending upon your product. For products such as watch, a side-on shot might work best. Keep the product image simple and clutter free to avoid confusing the customers.
3. Take Shots Complementing the Main Product
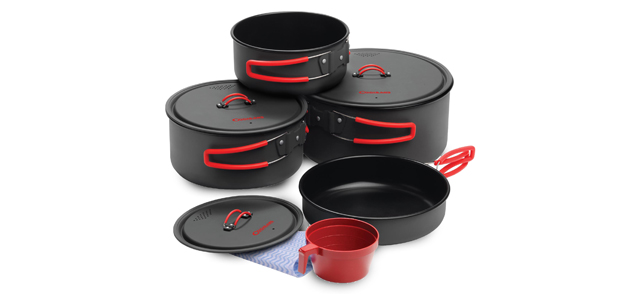
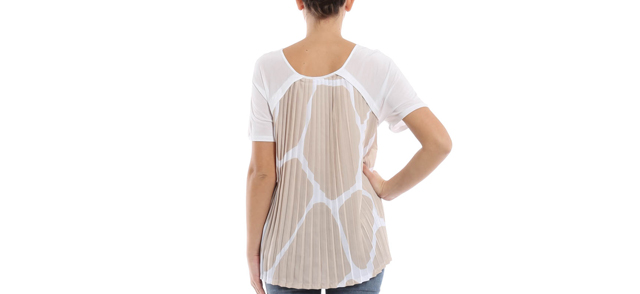
Next thing would be to upload some in-context product images to help sell your products. Show your product in use, for instance, complement a t-shirt with a nice pair of jeans. However, make sure not to use this as your main image, as ultimately your goal is to sell your product and not to show off your photography skills.
4. Do the Cleaning
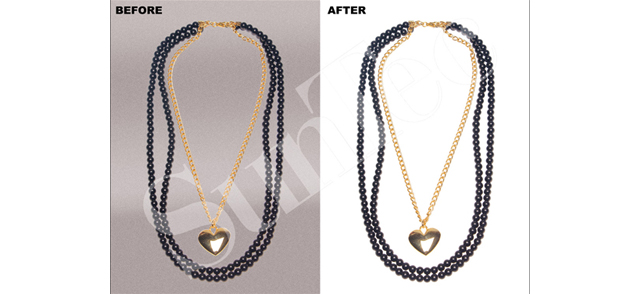
There is still lot to be done once you keep the camera down. It is always good to remove the background and let your products speak for itself. Products images set against white background draws customer’s attention to the product fand also seamlessly matches with the website template.
5. Size Does Matter
When it comes to uploading products images on your eCommerce store, image quality and size does matter. While setting up your online store, you are required to choose the image dimensions according to the template you are using. Usually on a product listing page, most image templates have the longest side that ranges between 500 and 700 pixels. Well this is small for a product image. Don’t manually resize your images to that size before uploading them to your eCommerce store. As lowering the resolution of product images will lead to blurry images. What size images you have won’t matter, provided they all have the same width to height ratio as the template. The images will be automatically resized when they will be uploaded to your eCommerce store.
Images of 1200px on the longest is highly recommended, as it will give you a decent sized image when zooming. All this being said, it is worth noting that there is no way you can make your product images bigger while maintaining its actual clarity, so it is advised that when you set up your template, ensure that you have not set the zoom feature larger than the dimensions of the images you upload.
It is best to create a canvas of the image size you require using Photoshop and then dragging your product images into the canvas, to resize them and not the original images.

6. Maintain the Consistency
Finally, make sure that your product images look consistent. Sure, the eCommerce store’s template will make your product images of the same size, and certainly a white background will help drive sales. But if you wish to make your product images look more professional, consider adjusting your product images in such a way that they take up somewhere around 80-90% of the canvas. This will ensure that even a page having differently shaped products, will have an element of consistency.
So, this is it for now. Some of these tips will help ensure that you upload the best quality product images possible. So, what are you waiting for?

For More Information
If you have any further questions about this topic or need any assistance with eCommerce product photo editing, please do not hesitate to contact us for help. Please write to us at info@suntecindia.com.